40I want to calculate my gauge
Turn your swatch into a gauge, compare it with the pattern's, and adjust
- A knitted or crocheted swatch, ideally washed and blocked the way the finished piece will be.
- A ruler or tape measure. Nothing in the app needs switching on.
- The toolkit is under Tools → Calculators, which Basic mode also shows.
What is gauge? Gauge (also called tension) is how many stitches and rows fit into a set measurement, usually 10 cm (4″). Every knitter and crocheter works a little tighter or looser than the next, so your gauge decides the final size of your project. A pattern that says “20 sts = 10cm on 4mm needles” is telling you how dense the fabric was meant to be.
Why does it matter? Being out by one stitch per 10cm can add several centimetres to a sweater. Knit tighter than the pattern and the piece comes out smaller. Knit looser and it comes out larger. The gauge calculator lets you measure, compare and adjust before you commit to a whole project.
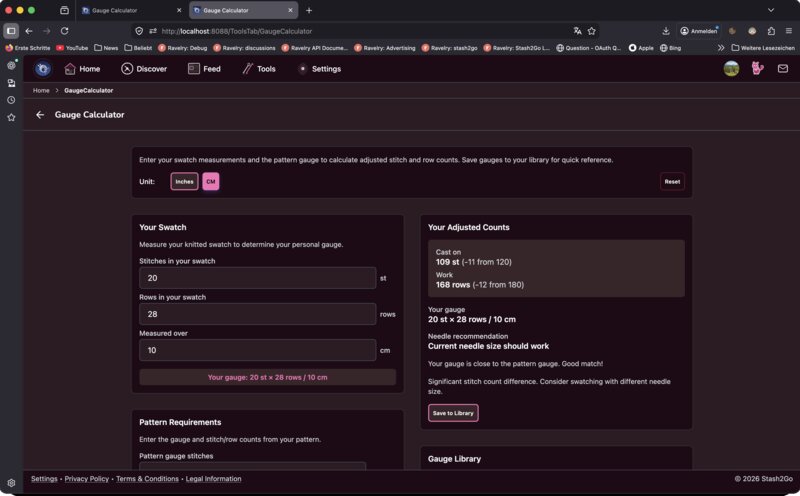
Go to Tools → Calculators → Gauge Toolkit and stay on the Gauge Swatch tab. Type in how many stitches and rows you counted, and the width and height you measured across.
The calculator turns your raw count into a standard gauge. For example:
- You counted
- 24 stitches over 12 cm
- Your gauge
- 20 sts / 10 cm
It does the same for rows, so you get both stitch gauge and row gauge in one step.
Your own gauge appears as you type. For the adapted stitch and row counts, tap Calculate. That button stays greyed out until all four numbers are in: your swatch gauge, the pattern's gauge, and the pattern's total stitches and rows.
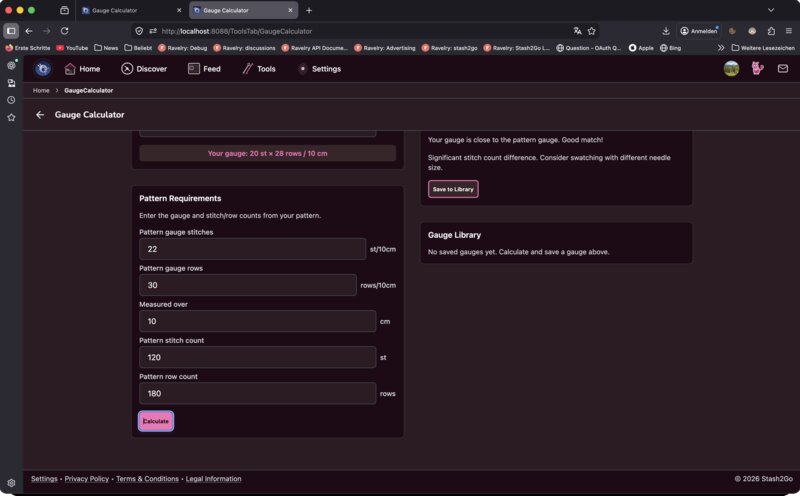
Type in the gauge the pattern asks for and see how yours compares. The calculator shows the difference and suggests a needle change: go up a size if your gauge is too tight (too many stitches), or down if it is too loose (too few stitches).
Matching gauge exactly? Cast on with confidence.
Off by half a stitch? Fine for most garments. Swatch once more if you want to be sure.
Off by a whole stitch or more? The finished piece will come out a noticeably different size. Change your needle size and swatch again before you start.
Row gauge off but stitch gauge right? That happens often. Most patterns give lengths in centimetres rather than row counts, so stitch gauge usually matters more. Adjust the row counts if the pattern depends on them.
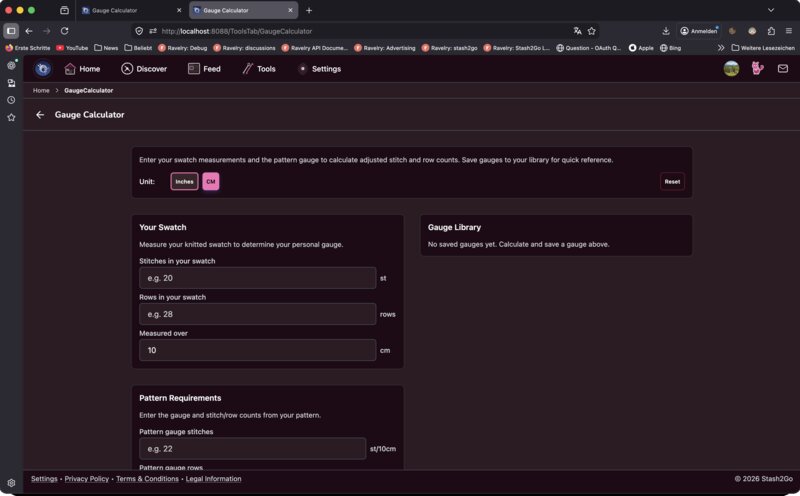
The two buttons at the top switch between Inches and CM. The toolkit does the converting, so you can work in whichever one your pattern uses.
Here are the usual stitch gauges per 10 cm for common yarn weights:
- Lace
- 32–40 sts
- Fingering
- 28–32 sts
- Sport
- 24–28 sts
- DK
- 20–24 sts
- Worsted
- 16–20 sts
- Bulky
- 12–16 sts
- Super Bulky
- 8–12 sts
These are only guides. Every yarn, needle and knitter together is different. Always swatch.
The toolkit's second tab, Adapt Pattern, answers the question a swatch really raises: my gauge is not the pattern's, so how many stitches do I cast on? Give it the pattern's gauge, your gauge, and the pattern's stitch and row counts. It gives you back the numbers to work to, Cast on N stitches and Work N rows, along with the stitch and row ratios and a needle size to try.
A gauge you have measured is worth keeping. Save it with a name, the yarn weight, the needle size, the project type and a note. Load it back the next time you use that yarn and needle together, and the second cardigan in the same yarn does not need a fresh swatch to remember what worked.
- Gauge (tension)
- How many stitches and rows fit in a measured square - usually 10 cm or 4″. It is what decides the finished size.
- Swatch
- The test square you knit to measure gauge. Bigger than 10 cm is better: you measure the calm middle, away from the edges.
- Blocking
- Washing and drying the swatch the way you will treat the garment. Many yarns change size when you do, so an unblocked swatch can flatter you into the wrong size.
- Stitch gauge vs row gauge
- Stitch gauge sets the width, row gauge the length. Row gauge is the one patterns most often let you fudge, until the shaping is worked over a row count.
- Needle size systems
- Metric millimetres, US numbers and UK numbers all describe the same needles. The conversion chart in Needle Manager turns one into another.
Available on iPhone, iPad, Android, and web at app.stash2go.com